EASAlert
![]()
SECTION VI. Using ComTekk EASAlert
CONTENTS
- Running EASAlert
- EASAlert Console Screen
- Preferences (Settings)
- Windows Volume Control
- Windows Recording Control
- Alert Log Viewer
1. Running ComTekk EASAlert
If you haven't yet done so, install the software and enter your registration key if you have already purchased a license. EASAlert will function without a license for a 30-day trial period.
Once EASAlert has been successfully installed, you may simply double-click the EASAlert desktop icon or Click the Windows Start menu, then Programs, choose the ComTekk folder, then EASAlert.
Continue on to Section 2 below for detailed description of the buttons and screens.
2. The EASAlert Console
The main console screen consists of four panels, Control Panel, Activity, System Status, and Recording Control plus the Main Menu and Status Bar at the bottom of the window. All controls are operated using a single click of the left mouse button unless otherwise indicated.
2.1 Control Panel - This panel contains the most-used controls and indicators.
Clock - Current time of day in 24-hour format
Mute button - This will simply mute the computer speakers so receiver audio is not heard until there is an alert. If you prefer to mute only the receiver audio, uncheck Listen to this device in Windows 7/Vista audio control panel, or mute the input on Windows Volume Control in earler versions of Windows (XP, 2000, etc). See section 4 for more...
Reset button - After an alert activation, this will silence the local audio/visual alarm as configured in Alert Options.
Alert Indicator - Flashes on alert activation if enabled in Alert Options. The Event Type will appear above the beacon light graphic.
2.2 System Status panel - Four lighted indicators give a real-time status of each major sub-system:
Legend OFF / Disabled ON / Enabled / Ok Warning Error Condition Busy, working Decoder - Master ON/OFF status indicator. Blue indicates decoding is in progress. Double-click to open the Decoder Window, which will allow viewing of raw and translated data.
Mail Server - Green when ready, Red indicates unable to connect to email server.
Alert Log - Active on Green, turns Red if an error writing to log file was encountered.
Recorder - Turns Blue when recording WAVE audio, red if an error was detected.
2.3 Audio Recording panel - Includes Instant Replay controls and date/time of last recorded alert.
Play button - disabled until an alert recording has been completed. Click to start audio playback of last recorded alert dispatch.
Stop button - stops audio playback, resets to beginning of file.
Last Activation - Indicates date and time of last alert received.
VU Meter (not shown) - provides visual audio input level indication
2.4 Status Bar - provides another layer of real-time status information.
Left pane - Indicates status of various sub-systems
Right pane - gives additional details, such as error messages, file names, unit IDs, etc.
2.5 Main Menu
File->
View Log - Opens the log file for viewing [more...]
Data -> Backup or Restore your Email List file.
A/V Test - Click to see/hear a simulated alert based on your chosen local alert settings
Exit - Shut down and exit EASAlert. An exit confirmation dialog will appear if enabled.
View->
Preferences [Ctrl+S] - Opens the EASAlert Settings window. Requires password if protect option is enabled.
Email List - Opens the Email List for viewing/editing. Requires password if protect option is enabled.
Volume - Opens the Windows Volume Control (Shortcut: Ctrl+L)
Messaging - Opens the Messaging window
Decoder - Shows the Decoder Window, which allows real-time viewing of raw and translated data.
Help->
Help Contents - opens the EASAlert user manual [this file] in your default HTML viewer or Internet browser (Shortcut: F1 key)
About - Displays information about this software
Register - used to enter your software activation key
2.6 Activity panel - Serves as a live visual message queue, displaying the Event code, Event name and time of issue for each alert received.
2.7 System Tray Icon - When EASAlert is minimized, only the tray icon will remain visible in the lower right-hand corner of the Windows Desktop. Left-click the icon to show the console window. Right-click the icon to show the popup menu with options About, Restore, Setup, Exit.
3. Preferences [Settings] Window
To access the settings screen :
From the Main Menu, click View -> Preferences or press [Ctrl+L]
Click here for help on Settings.
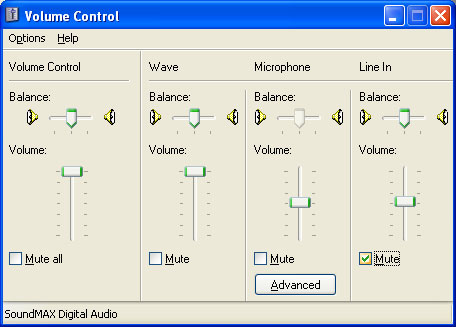
4. Windows Volume Control
This section is provided as a reference - it should not be necessary to adjust these settings for proper operation of EASAlert.
Windows Volume Control (Output): [Windows 95, 98, NT, XP, 2000, ME] - scroll down for Windows 7 / Vista.
This screen controls the sound card OUTPUTS and will generally have no effect on the decoder, since it uses the sound card INPUTS, which are controlled by the Recording Control (see next section below).
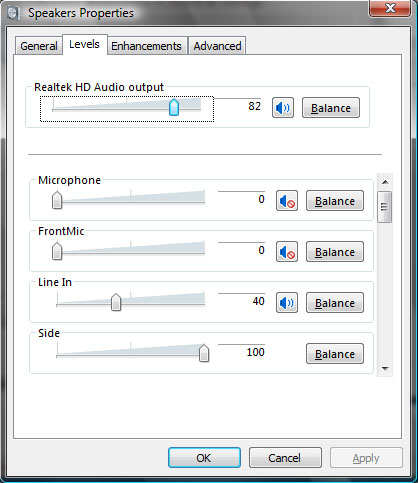
Windows 7/Vista playback [output] settings, accessible from Windows Control Panel

Click "Properties" then select the "Levels" tab for playback mixer controls. Again, these controls will have NO effect on the decoder's operation:
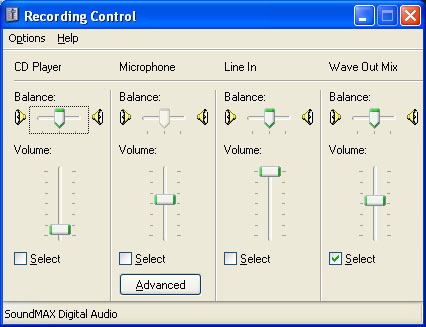
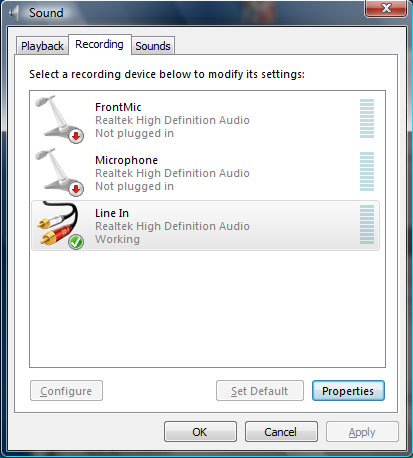
5. Windows Recording Control
This section is provided as a reference - it should not be necessary to adjust these settings for proper operation of EASAlert.
[Windows 95, 98, NT, XP, 2000, ME] - affects sound device INPUTS, such as LINE , AUX, Wave, or Microphone. Vista/7 users, scroll down.
To access Recording controls, click the Mixer button in the Settings window, or with a double-click on the speaker icon in your system tray. Select "Options" from the menu, then "Properties." Click the "Recording" radio button. Input should be selected here. See EASAlert Audio settings.
For Windows 7 / Vista Users, click the Mixer button in the Settings window. Line In is selected in the example below.
Click Properties then select the Levels tab for Line In level control. This sets the audio level sent to the Decoder.
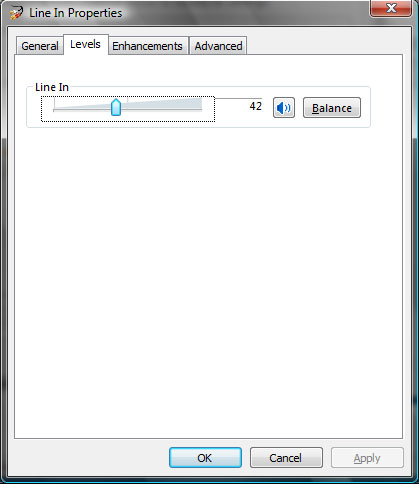
Additionally, the program may be given exclusive control of the selected device by checking the box below. This prevents the user from accidentally changing settings for this device. While not required, this option may be helpful in some cases.

6. Alert Log File
To enable the text log feature, click the "Log File" checkbox in Settings->Alert Options. The Open File dialog will pop up - select a new file name and folder, OR select an existing file to append a previous log. You will be prompted whether to append the file. The Alert Log status indicator will be GREEN when logging is enabled.
To stop/disable logging, just click to un-check the "Log File" checkbox. For convenience, the last folder used is saved upon closing the program.
Each alert saved with date, time, audio file name/path if audio recording has been enabled, and the SAME header as received from broadcaster.
To view the log file while EASAlert is running, select File->View Log from the Main Menu.

Log file name/path is displayed at the top.
Double-click an entry to see the decoded message above the entry list. If audio was recorded, it will be played after double-click.
The log viewer can remain open while new alerts are received. Click Refresh Log to refresh the log view. This will display any new events that may have been received since the viewer was first opened.
NOTE: The log file is a text file, saved in .CSV (Comma Separated Value) format, which can also be viewed and edited with Microsoft Excel, OpenOffice, or any text editor, such as Notepad or WordPad. Tip: If you don't have Microsoft Excel, CSView is available as a free download.
-------------------
Disclaimer:
The author makes no warranties or guarantees of performance or suitability for any particular purpose, and assumes no liability whatsoever for the use or mis-use of any software products. This product is not intended for use as a primary means of notification.